Necklace

Love cute fabric rolled rosette necklaces? I sure do! Want to know how to make a single fabric rolled rosette necklace for yourself or a friend?


Here’s the DIY:
if you’re not the crafty type, visit AlongForTheRide (available in single rosettes) & Soleil Selene (available in 3-7 rosettes) for the best fabric necklaces
Gather your materials. You will need scissors, hot glue gun and glue, chain necklaces, round bail plates (jewelry aisle at HobLob) fabric, and felt.


Cut a thin-ish strip of fabric, a little less than 1 & 1/3 yards. The longer the strip, the larger the rosette. The wider the strip, the “wider” each twist will look.

Pinch the end in half.

Tie in a knot.

Start rolling and twisting fabric around the knot.

Glue a little as you go. A little plop of hot glue is enough. You don’t want any glue to show up on the fabric. I am still working at getting better at this.

Once you are to the size of rosette you like, trim excess fabric and glue end to the base of the flower.

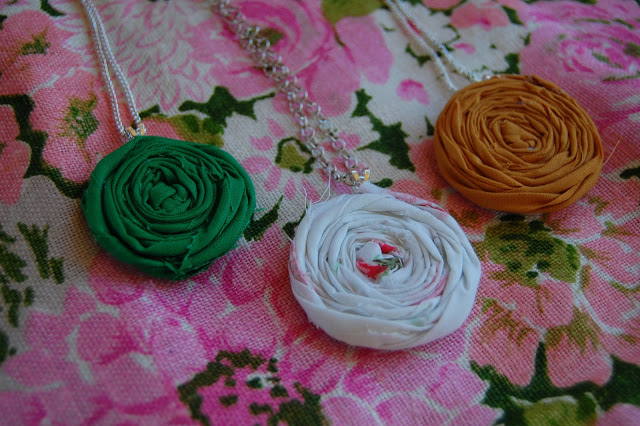
It should look something like this:


Grab a round bail plate:

String chain through the bell plate. Then glue plate to back of the rosette.

Cover the back of the rosette/bail plate by gluing over it with a round piece of felt. Guestimate or cut to size.

I glued two felt circles on, one large and one small, to make sure I couldn’t see the bail plate through the felt & for extra sturdiness.

Now you have a cute necklace!

Tiny bit of glue in the middle of this one, but it’s still cute:

The white one is made from a vintage sheet. Shabby chic!


Easy peasy.